Setup the instance
Setup the instance for the first time:
Get the local user password
- Go to https://app-catalogue.cern.ch
- Select the project for your sentry instance (
[name]-sentry) - Navigate to
Workloads->Secrets
- Click on the sentry-local-passwords
- Click on Reveal values and get the password
Login on Sentry
- Access the instance for the first time at
https://[name]-sentry.web.cern.ch - Account: Enter the e-mail of the Sentry administrator
- Password: Enter the local user password
- Click on Login

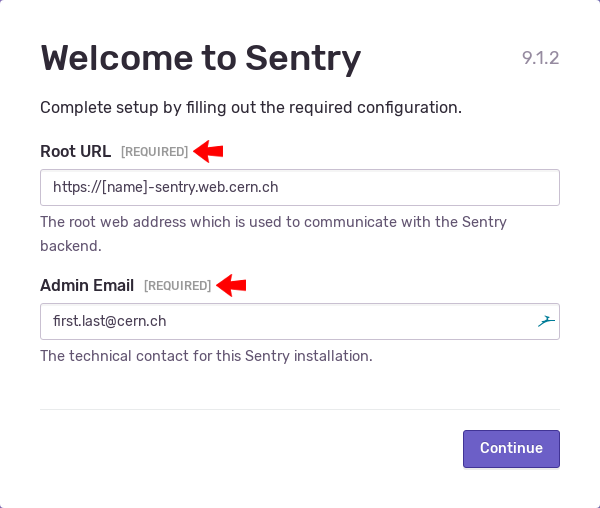
Welcome to Sentry
- Complete the setup by filling out the required configuration
- Root URL: It should be correctly prefilled as
https://[name]-sentry.web.cern.ch - Admin Email: It should be prefilled as the e-mail of the Sentry administrator but you can adjust as you see fit
- Click on Continue
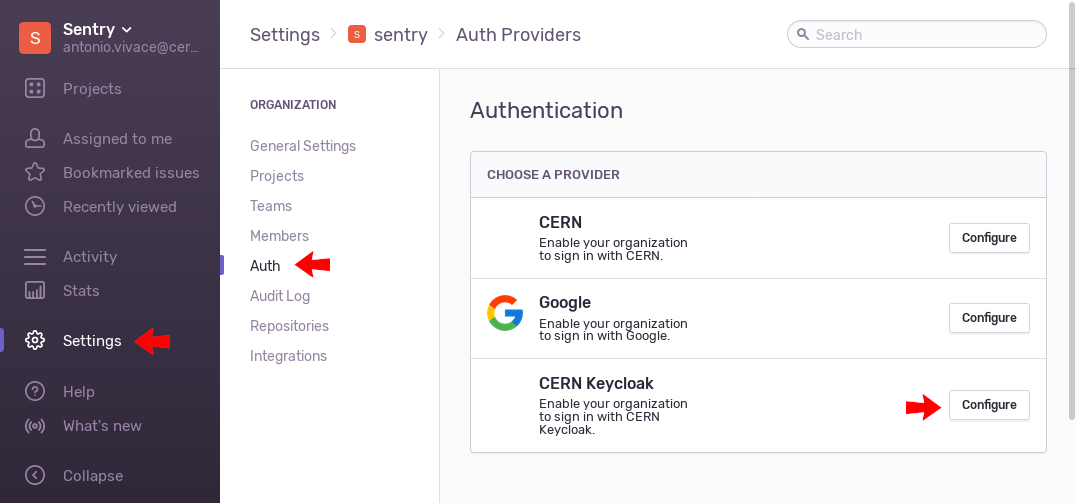
Enable CERN Single Sign-On
- Click on Settings
- Click on Auth
- Click on Configure next to CERN Keycloak
- You will be prompted to login with your CERN account
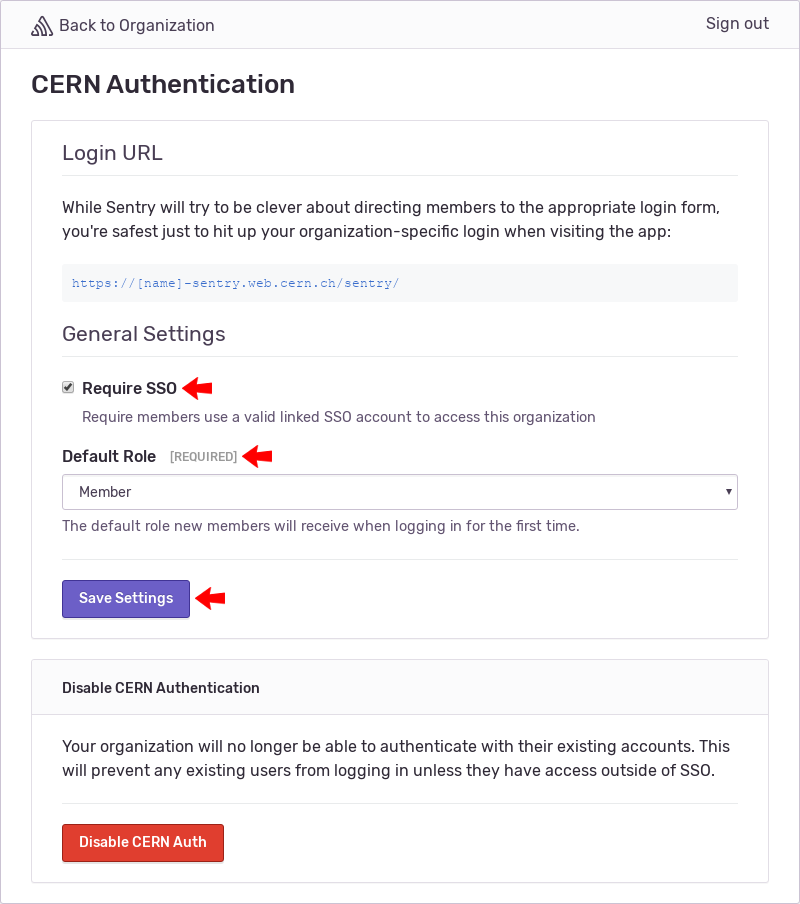
Configure CERN Single Sign-On
- Upon a successful login with your CERN account you will be prompted to configure CERN Single Sign-On
- Require SSO: Leave checked
- Default Role: It is suggested that you choose Member
- Click on Save Settings
Adjust the settings on Sentry
- Your instance is ready to use and you can go ahead and adjust the settings as you see fit